How to Secure a File in Windows 7
Z7_3054ICK0KGTE30AQO5O3KA30N0
HP PCs - Backing Up Your Files (Windows 7)
This document pertains to all HP and Compaq PCs with Windows 7.
Unfortunately, most people think to back up their files after it is too late. There are many ways that the information on your computer can be unintentionally lost. A child accidentally removing programs or data, a power surge, natural disasters. It is recommended to regularly make backup copies of your files and keep them in a separate place. Doing so helps replace some, if not all, of your information in the event something occurs to the originals on your computer.
Backing up files using Windows 7 native CD burning
Use Windows 7 to back up your important files onto a CD. Use the steps in this section to create a backup disc.
Before you begin backing up your files
Before backing up your files, make a list of your important files. Use the list to keep track of files while creating the disc and to retrieve files later if needed. Here are some file suggestions to get you started when creating a list:
-
Documents folder
-
Digital photographs
-
Bank records and other financial information
-
E-mail address book
-
Internet bookmarks
Creating a backup disc in Windows 7
Create a list of the files you want to back up before you begin. Follow these steps to back up your files using Windows 7:
Show me how

-
Place a blank CD or DVD in the CD or DVD writable drive.
A window for the writable drive opens automatically. If a window does not open, click Start
 , click Computer, and then click the writable drive. Skip to step 3.
Figure : AutoPlay window

-
Click Burn files to disc.
-
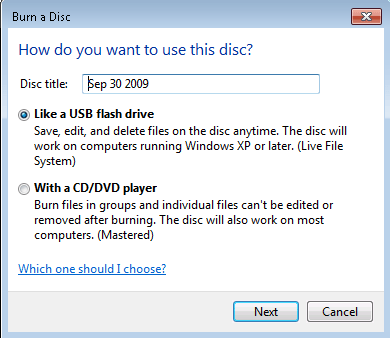
Enter a disc title and choose Like a USB flash drive. Then click Next.
Figure : How do you want to use this disc?
-
Windows formats the disc.
Figure : Formatting the disc
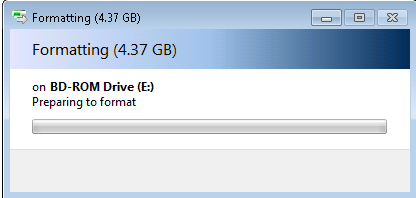
note:
Formatting the disc takes time. Do not shut down the computer until the format is complete.
When formatting is complete, the disc drive window opens.
Figure : Disc drive window

-
Open the Computer window or Windows Explorer and browse to the files to back up.
-
Click the files from other windows or from Windows Explorer. Hold down the left mouse button and drag the files into the window for the CD or DVD drive. Release the left mouse button to drop the files and burn to disc. As you drag files into the disc drive folder, Windows 7 automatically burns files to disc.
Continue copying files until all files are in the disc drive folder window and have been copied to the disc.
You have now created a backup disc in case anything occurs to the original files. Create a backup copy of these files on a regular basis to prevent loss of important information.
Label the disc with a descriptive name and store in a safe place. To restore the files from the disc, insert the disc into the disc drive and move the files to the hard disk drive.
Using Windows Back Up and Restore in Windows 7
Windows Back Up and Restore enables you to create backup copies of files and folders. Windows Back up and Restore is compatible with Windows Vista and it can automatically back up new and modified files on a regular basis.
You can also create an image of the entire computer. This image can be used to recover from a hardware failure. For more information, see Creating a system image in Windows 7.
Follow these steps to use Windows Back Up and Restore:
Show me how
-
Click Start
, and then click Control Panel. -
Under System and Security, click Back up your computer.
Figure : System and Security

Backup and Restore opens.
-
Click Back up now.
Figure : Backup and Restore
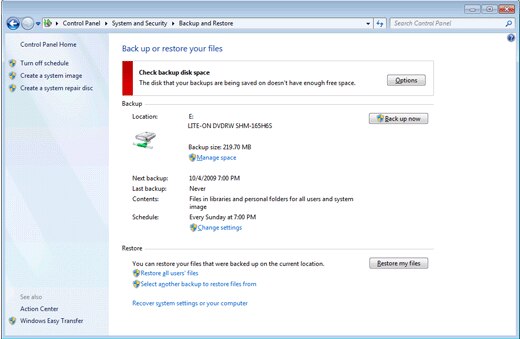
Backup and Restore backs up the folders and libraries to the backup location.
Setting up Backup and Restore for the first time in Windows 7
If this is the first time opening the Backup and Restore Center, follow these steps to set up Back Up and Restore:
Show me how
-
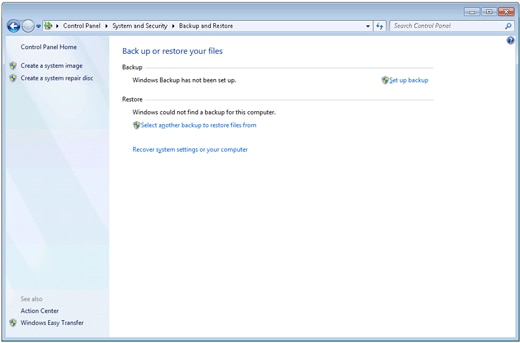
Click Set up backup.
Figure : Backup and Restore
If you are prompted for an Administrator password or confirmation, type the password or provide confirmation.
-
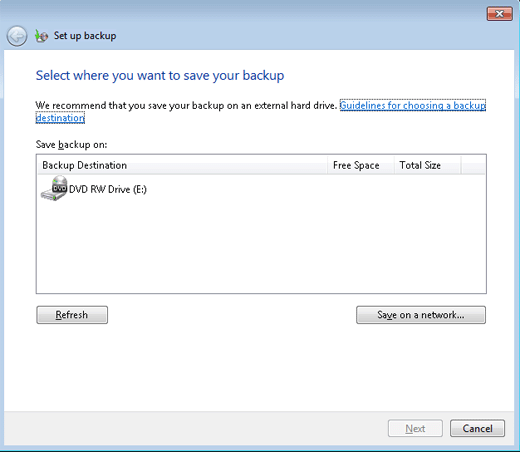
Select the location to save the backup, either an external drive or to disc.
Figure : Select backup location
-
Select what files to back up. Select Let Windows choose to back up files saved in the most common folders, or select Let me choose to manually select the files and folders to back up.
Figure : Select files and folders to back up

-
Click Next.
-
If you selected Let Windows choose, proceed to the next step.
If you selected Let me choose, select the libraries and folders to back up, and then click Next.
Figure : Select items to back up
-
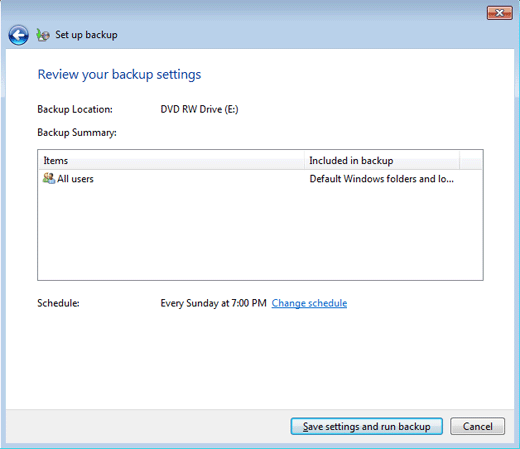
Review the settings, and then click Save settings and run backup.
note:
Backup and Restore schedules a backup every week by default. To change the schedule or cancel automatic backups, click Change schedule.
Figure : Review your backup settings
Restoring files using the Windows Back Up Files wizard in Windows 7
Use the Windows Backup Files wizard to restore all of the files that you backed up using the wizard. Follow these steps to restore your backup files:
Show me how
-
If the backup files are on a CD or DVD, insert the CD or DVD into the disc drive.
If the files are on an external hard disk drive, connect the hard disk drive to the computer.
-
Click Start
, and then click Control Panel. -
Under System and Security, click Back up your computer.
The Backup and Restore Center opens.
-
Click Restore my files or Restore all users' files.
Figure : Backup and Restore
The Restore Files window opens.
Figure : Restore Files window

-
Add files and folders to be restored using Search, Browse for files, or Browse for folders.
-
When done adding files and folders, click Next.
Figure : Restore location window

-
Choose to save the restored files In the original location or In the following location.
If you choose to save the restored files in a different location, click Browse to save to another location.
-
Click Restore.
The Windows Back Up Files wizard now restores the files.
-
When the wizard has finished restoring the files, click Finish on the verification screen.
Creating a system image in Windows 7
Windows Backup and Restore enables you to create an image of the entire computer. This image can be used to recover in the event of a hardware failure.
Follow these steps to create a system image:
Show me how
-
Click Start
, and then click Control Panel. -
Under System and Security, click Back up your computer.
The Backup and Restore Center opens.
Figure : Backup and Restore Center

-
Click Create a system image.
Windows looks for available backup devices, such as a hard drive, DVD burning drive, or network drive.
-
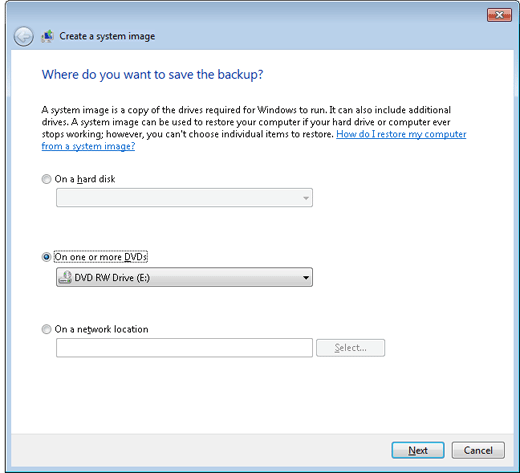
Choose the location to save your system image, and then click Next.
-
On a hard disk
-
One or more DVDs
-
On a network location
warning:
Do not save the backup to the recovery partition: FACTORY_IMAGE or Recovery. Doing so corrupts the HP Recovery information.
Figure : Choose a location to save the system image
-
-
Confirm the settings, and then click Start backup.
Figure : Confirm your backup settings
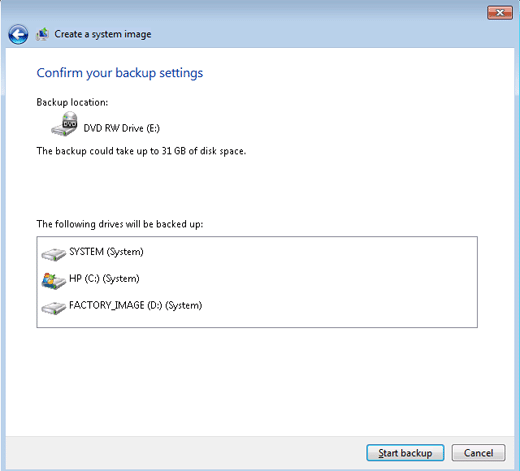
Backup and Restore saves the system image.
How to Secure a File in Windows 7
Source: https://support.hp.com/us-en/product/compaq-7-plus-tablet/6621901/document/c01817236
0 Response to "How to Secure a File in Windows 7"
Post a Comment